Pattern Testing – Nautilis Swimsuit

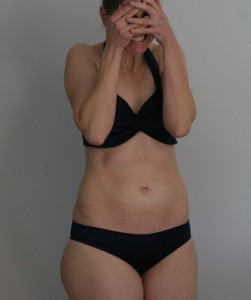
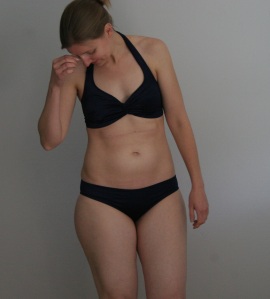
I made a swimsuit! I’d been thinking about making one for a while, so when I saw that Seamstress Erin was looking for pattern testers for her new swimsuit pattern I jumped at the chance. Nevermind that it was still cold and rainy here when I was sewing the suit…

Eek! Swimsuit photograph!

Eek! Swimsuit photograph!

This is my first time sewing with swimsuit knits, and I’ll admit being a little apprehensive, despite plenty of experience sewing knits in general. I needn’t have worried. This was a quick easy project. I suspect there will be more swimsuits in my future. Actually I’d really like to make a tankini version, as that’s my swimsuit style of choice. It sounds like that will be discussed in the upcoming sewalong Erin is going to run.

IMG_4942

So, I know there are lots of great swimsuit patterns out there these days. I’ve certainly been drooling over a few of them. Having only sewn up the Nautilus so far, I can’t comment on how it compares to other patterns out there. I will say though, that for someone sewing there first swimsuit, this pattern had great directions. Very clear and well explained. Lots of diagrams, and a section at the beginning with some helpful tips for sewing with swimsuit knits.

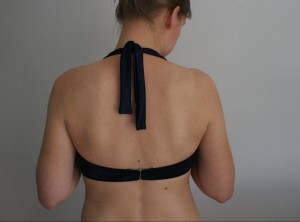
So, obviously I made the two piece version. I have a really long torso, and have never had any luck buying tank suits, so I’m out of the habit of wearing them. Although, that’s the beauty of being able to make my own I suppose. Now I can have a tank suit that fits it I want to! I opted to tie the straps at the neck, halter style, rather than fiddle with attaching them to the back band. I may go back and change that. Haven’t decided yet.

IMG_4946

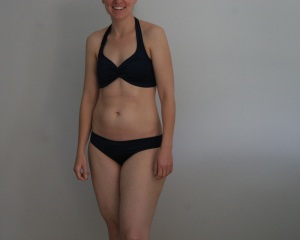
As to fit, the pattern is great. The bottom piece fits me perfectly. Seriously. I’ve never had a purchased suit fit anywhere near that good. I was so surprised when I tried it on. Just couldn’t get over the fact that it fit so well. Actually, I think I might try using the pattern to make underwear with. Why not? Anyway, I picked rather drastically different sizes for the top and bottom, based on the sizing chart. As it turns out, I should have sewn an even smaller size for the top. Need I mention that I’m very pear shaped? The sizing chart went through a few changes during the pattern testing process, and I chose my sizes based on the first version. I suspect a top sewn based on the final sewing chart will fit perfectly. That’s not to say my top didn’t fit me. It will work just fine for pool use. But it is a smidge loose on the sides, so I won’t be wearing it in the wave pool at Water World anytime soon. I suppose I would recommend sizing down, if one is between sizes. Swimsuit material does stretch, after all.

IMG_4940

My fabric was a standard swimsuit knit, nothing special there. And regular swimsuit lining. Oh yea, did I mention the suit is fully lined? Maybe that’s standard with swimsuits, I don’t know. But I definitely like that the suit is lined. Oh, and despite how it may look in the pictures, the suit is actually a really rich navy blue color. It was far too cold out to do any kind of outdoor photos, so the sub par lighting in my entryway had to make do.

There’s not much else to say about the Nautilus pattern. It was a quick easy project, with great directions, and very satisfying results. And now that it’s finally gotten hot in my neck of the woods, I need to get myself to the pool!
Lots of sewing and lots of sneezing

Well it’s just been nuts here. The last month has been full of frenzied sewing and not much photo taking. Oh, and the spring crud that seems to be going around. Everybody in my family has been sick. I still sound like death warmed over. Ugh.

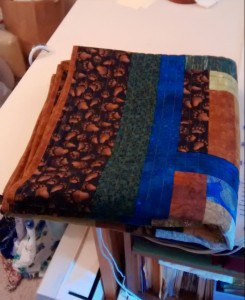
In between snotty tissues and coughing, there’s been lots of deadline sewing. First off is the wedding quilt for my sister-in-law. Who got married last June. Really, as long I they get the gift before their first anniversary then it’s not late. I love that tradition. It’s saved my bacon a few times for wedding gifts.

IMG_20150422_173110033

The quilt is actually the 8th one I’ve finished this year. So I’m way ahead on my goal, but way behind on documenting any of it. If I can just make it through the next couple of weeks of scheduling madness, then I’ll have time to start photographing things.

The rest of the sewing is all related to the upcoming wedding of some good friends. First off was sewing one of the bridesmaid dresses. The wedding is going to be fairly casual, and the bridesmaids were simply asked to wear dresses in certain colors, no real specifications on style. My friend who I sewed the dress for is currently seven months pregnant and wasn’t too happy with the limited selection of maternity dresses she could find. Brilliant woman that she is, she tried tracing a pattern off an existing simple jersey dress she owns. We tweaked the pattern a bit, and with relatively few adjustments came out with a lovely dress for her. Gotta love good jersey! I made a copy of the pattern, and plan on making a few shirt versions soon.

Next up is a silk robe as a bridal shower gift. The pattern is from Amy Butler’s In Stitches. I haven’t actually made many things from this book other than the bathrobe. But I’ve made at least five robes at this point. It’s my go-to bridal shower gift.

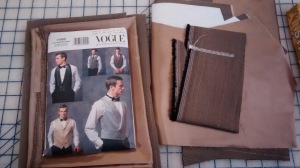
My husband is one of the groomsmen in the wedding. The guys are wearing dark jeans, light dress shirts, light colored ties and brown vests. He already had everything except for the vest, so that’s where I come in. I actually made formal vests for my husband and the groomsmen for our wedding, so I’ve already got a good pattern. It’s just a matter of finishing the darn thing at this point.

Vest for husband

Vest for husband

Last, of course, is a dress for me. I’m not in the wedding or anything, but assuming I can find the time, I’m going to make a dress to wear. Nothing fancy, as the invite made it clear that the wedding is casual. But something that will look nice and at least be comfortable. I’ve got the fabric picked out already (from my stash of course) and the pattern. Whether I get time to sew it up before the wedding is a whole different issue.

IMG_20150508_214948997

Aside from all that, there have been a few pairs of boxers for the husband, a quick t-shirt or two for me, and a pair of Thurlow shorts almost entirely finished! Look at me, sewing before the season, instead of halfway through it! That never happens.

So yea, really busy. Anybody feel like that happens every spring?

12 Quilts – Number 2

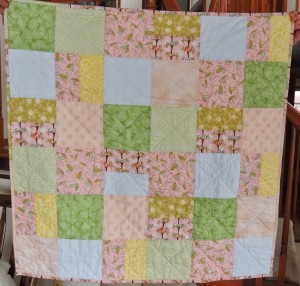
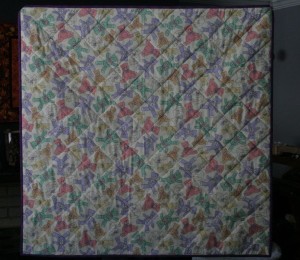
Second quilt for the year is a quick little baby quilt for some good friends. Pretty basic, and very straightforward to piece and quilt, but I’m happy with it all the same. Hopefully it will be well used. This one I did actually start and finish entirely this year. All in about three evenings actually. You’d think that will nine months to prepare I’d have managed to get the quilt done more than a week before the baby was due, but no, apparently not.

Basic blocks and cross-hatch quilting

Basic blocks and cross-hatch quilting

The quilt is made entirely with stash fabric (and really, it’s prettier in person than the photograph). Mostly the fabric is leftover bits and pieces from other baby quilts. It was actually quite satisfying to pull the whole thing together from stash fabric.

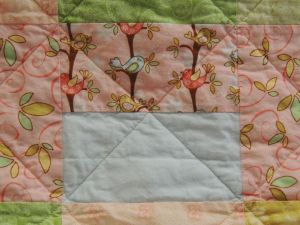
Pieced block

Pieced block

My standard formula for quick baby quilts is to use 5 to 6 inch square blocks and lay them out in a simple grid such that the finished quilt is about a yard square. In this case, I added a few pieced blocks (just two rectangles put together to form a square) to make the most of the fabric scraps I had.

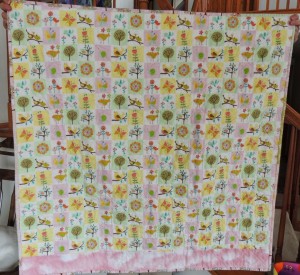
Back

Back

The backing fabric was just a little bit too small, thus the pink strip at the bottom. It’s hard to see in the photographs, but the binding is also pieced together from the scraps. Let’s just say there’s not much of this fabric left.

Not much else to say about this one. Quick and easy. Which is good, since the recipient arrived early! I’m not the only one who waits until the last minute to make baby quilts, right?


12 Quilts – Number 1

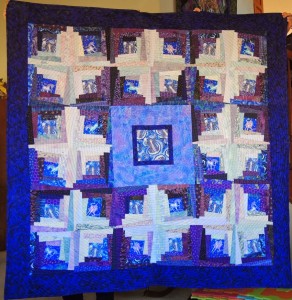
Okay, of the twelve quilts I plan on finishing this year, here’s the first one – the Wizard quilt (I know, really creative name, right?)

Kind-of hard to photograph...

Kind-of hard to photograph…

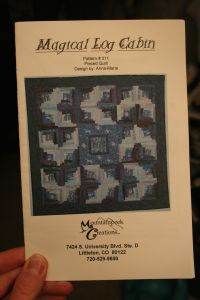
This quilt is from a kit that I bought probably at least a decade ago (yikes!). I followed the pattern, except for a little re-arranging of the final block layout.

Original pattern

Original pattern

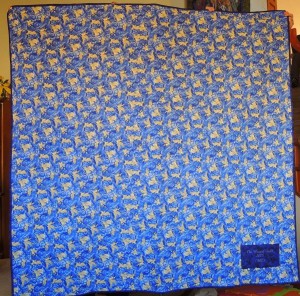
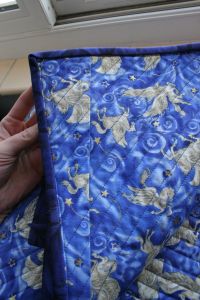
Even if I didn’t remember buying it so long ago, I’d know it was an old quilting purchase by the backing fabric. In my earlier years of quilting, I would always buy large pieces of fabric for quilt backings, so the back would be all the same fabric. In more recent years, I try to piece the backing together using any leftover fabric from the top and whatever else I can find to match in my fabric stash. Does anybody else do this? Maybe I’m just weird. It actually feels a little weird now to have a quilt backing be out of only one fabric. Excepting baby quilts, which are usually small enough that I can find a single piece of stash fabric for backing.

Pegasus backing fabric

Pegasus backing fabric

I finished the quilt top during a really productive weekend retreat two years ago, put it aside for a while, and then at the same retreat this past fall I started quilting it. Finally got around to finishing it last month. And let me just say that quilting retreats are one of the best things in the world. I go on one every Fall with a group of women from my quilt guild, and it’s an absolute blast. Not to mention that I can cram an insane amount of sewing into a weekend where I don’t have to cook, clean, or take care of anybody or anything else. Such luxury!

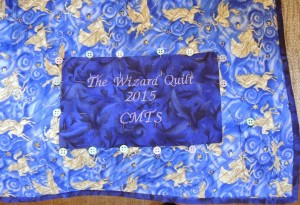
Embroidered label

Embroidered label, still pinned on

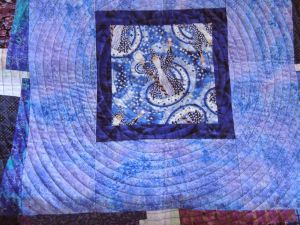
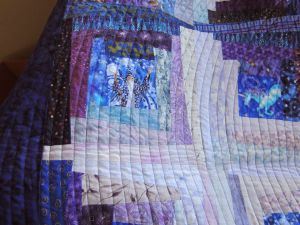
Aside from the fabric, which I love (and really, it’s so much prettier in person), my favorite thing about this is the quilting. The whole thing is quilted in a spiral with my walking foot.

Spiral quilting

Spiral quilting

It was so easy, and sort-of relaxing to do. And it looks so finished! I don’t know how else to describe it. But I’m thrilled with the quilt. The technique is from a Craftsy class about quilting with your walking foot. To be honest, I still haven’t finished watching the class. I got far enough into it for the spiral design, and then promptly stopped watching so I could go try it out. Awesome, awesome way to quilt something, especially a larger quilt. This one, for reference, is about 64 inches square.

Spiral quilting and wonky log cabin blocks

Spiral quilting and wonky log cabin blocks

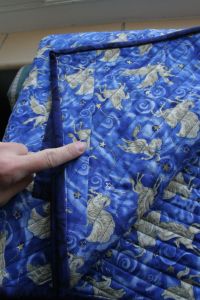
The one thing I will mention though, is that the quilt top can shift a bit during quilting. Even though I had the whole thing pinned pretty heavily (using those bent quilting safety pins), the top still shifted a bit. Had I left a generous amount of batting and backing around the edge of the top this wouldn’t have been an issue. As it was, I ended up having to add additional little triangles of backing at each of the corners before finishing the quilting.

Backing addition

Backing addition

I’m probably not explaining this very well. Imagine you have two squares of paper on top of each other. Twist the top square just a little and suddenly the corners of the top square are hanging off the edges of the bottom square, just a little. If you look closely at the back, you can see the seams where I had to add in the extra little piece at each corner.

See? Right there...

See? Right there…

Thankfully, it was a pretty easy fix. I plan on experimenting with this technique some more, so next time I’ll just allow for some extra batting and backing around the edges.

I smile every time I look at this quilt. I can’t even describe how happy I am to have it finished. And it feels especially nice to have made such a big start on my quilting goal for the year.

Anybody else out there making a good start on goals for the year?

Goals

Back in January, like most of the rest of the world, I started thinking about the new year and what I wanted to accomplish. Let’s just say it’s a long list, like usual. And not necessarily worth posting anywhere. But as I’ve actually made some progress on one of my goals, I thought I ought to at least put it out there to share.

I’m going to finish twelve quilts this year.

Yup. Twelve. Actually, it shouldn’t be that hard. It’s only February and I’ve already finished three. Maybe I should actually push myself and revise that number up a little. Maybe.

Note that I said “finish” and not “make” or “start and finish”. Really the main thing that makes this a fully achievable goal is that I have a pile of completed quilt tops waiting in my studio, and that I’m counting small wall hangings and baby quilts just as equally as bed quilts. I’m really bad about piecing a quilt top and then never actually quilting it. So, this goal is my attempt to clean out my studio a little bit, and get more into the habit of finishing my quilts all the way.

I’ve got to take photos of the quilts finished so far, but here’s a little preview of the first one. More to come soon!

Spiral quilting and wonky log cabin blocks

Spiral quilting and wonky log cabin blocks


Starting Over

So. The last time I posted here was around the same time my brother ended up in the hospital for a week. It was very scary. After lots of worrying that I’d lose him, posting here just didn’t seem that important anymore.

Things have since gone sortof back to normal. He needs a new kidney, but is otherwise healthy, and dealing with all of this amazingly well. My family has pretty much settled into this new reality, and we’re all very grateful for modern medicine.

That said, by the time things started to seem normal again, I felt like I’d been gone too long to come back here and try writing again. But, it’s a new year now. Well, a month into it, really. Anyway, I figured I either needed to start posting again now, or never.

So, I’m just going to start over here. I don’t have any pictures to post, or anything terribly exciting or informative to write. I just thought I ought to write something. There it is. Happy (late) new year. It’s a year of new beginnings. In fact, I’ve got to get a baby quilt made for some friends who are expecting a new beginning here in the next week! Off to sew.

Red Renfrews and a Plain Plantain

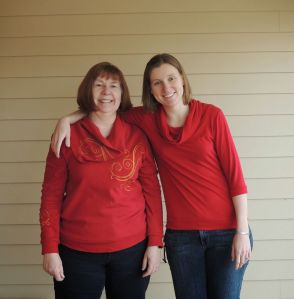
As I reach for the me-made shirts in my closet far more often then store bought at this point, it seems prudent to make a few more. Enter one of my favorite shirt patterns: the Renfrew. I’ve already made eight (I think) shirts off this pattern, in a variety of fabrics, and using most combinations of sleeves and neck finishings on the pattern. This is the first one I made with a cowl neck and the three-quarter length sleeves. As usual the top went together without a hitch. This one is made out of a super drapey rayon-poly jersey. It feels great, and is light enough I should be able to wear it well into the spring.

RedRenfrews1

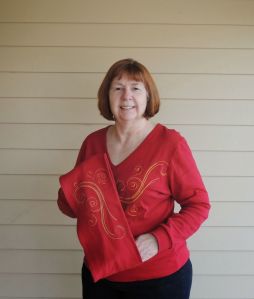
The lovely lady standing next to me is my mom. In a funny bit of coincidence, she happened to be sewing a red Renfrew at the same time I was. So of course, we took pictures together. Her top is made out of a heavier weight cotton interlock. She added the machine embroidery accents. Also, she made the cowl removable! I think it’s a great idea, as it makes the shirt wearable for a great range of temperatures. Too hot? Take the cowl off. Too chilly? Put it back on! I didn’t even realize she’d made the cowl a separate piece until she told me. She did mention that she made the cowl slightly larger around (maybe and inch or two – I should probably check).

Removable cowl!
Removable cowl!
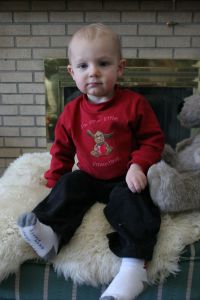
As there was a little bit of my mom’s red fabric left, kiddo got a shirt too! I love that I can sew clothes for him out of what might otherwise be considered scraps. I know that won’t last for long, given how fast he’s growing, but I’ll enjoy it while I still can.

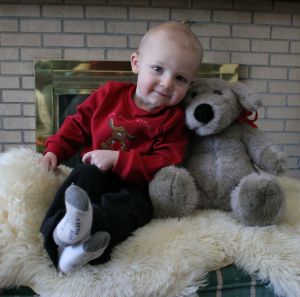
Kiddo’s shirt is off a vintage pattern for Toddler Sportwear by Sunrise Designs. I’m guessing it was printed in the late 1970’s, or early 80’s since my mom made clothes off this pattern for my brother and I. Thankfully, after we both out grew it, she tucked it away to use for future grandchildren. And I’m thrilled she did! It’s got nice classic patterns for shirts, pants, shorts and jackets that should be enough to keep kiddo dressed for a while. And it’s sized 1T through 4T. Anyway, this was the first shirt we made him off this pattern, but it fits so well, my mom has already cut out four more. She also machine embroidered the bunny on his shirt. The text reads “I’m your little Valentine”. Yes, it’s a Valentine’s Day shirt. That’s how long it’s taken me to get around to this post. Sigh.

ValentineKiddo2And one more picture for good measure…

ValentineKiddo1

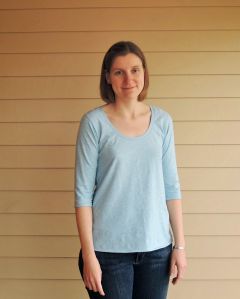
While I was on a shirt making roll, I decided to try out the Plantain, a free pattern by Deer & Doe. I’ve seen the shirt made up on countless other blogs, and thought it would be good to make something other than a Renfrew for once. You know, variety and all. Anyway, I’m pretty happy with how it came out.

PlainPlantain1

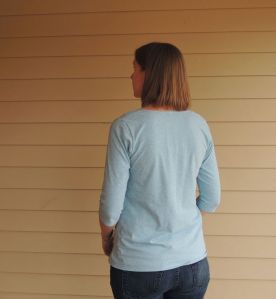
Since I really had no idea how this was going to fit, I opted to make a test version before cutting into any of my really nice fabric. I’d already made two other shirts (maternity, no less) out of this blue fabric, so I wasn’t too worried about wasting this fabric if the top came out awful for some reason. Admittedly, this isn’t the best fabric choice. It’s a cotton/lycra (or spandex? how does one tell?) blend, so it’s got plenty of stretch. Not much drape though. Still, the shirt is wearable, and now I know how the pattern fits.

PlainPlantain2

I didn’t bother with the elbow patches this time. Maybe on the next shirt. The bottom hem does tend to roll up, but I know that’s due to the fabric, since both the other shirts in this fabric do the exact same thing. The sleeves are a bit shy of the three-quarter length on the pattern, because I simply ran out of fabric. The length works fine for me though.

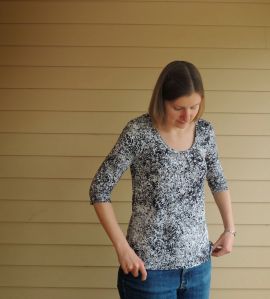
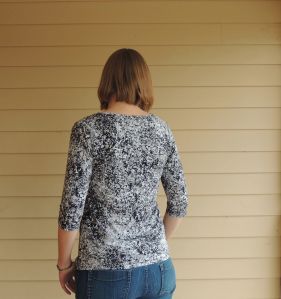
In the lengthy interval it’s taken me to get this post up, I’ve actually finished a second Plantain. This one is out of a lovely, drapey rayon jersey. It’s a much better fabric choice for this pattern.

PebblePlantain1

As with the first one, I used up the whole piece of fabric, and the sleeves are actually a bit shorter than the pattern’s three-quarter length sleeve. Still just enough to cover my elbows though. But not really long enough for the elbow patches. Eventually I’ll make a long sleeve version and put on the elbow patches.

PebblePlantain2There’s not much else to say about the Plantain. It’s a lovely pattern, and one I’ll certainly sew again. Actually, I’ve already played with it some more since this last shirt. But I’ll save that for another post.

Studio Re-Vamp

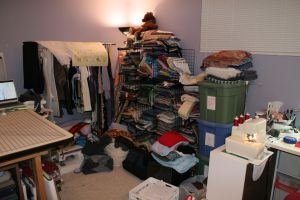
I tend to work better in clean organized spaces. I’m able to focus better, and I feel more energized to work on projects. This would be great except that my studio is rarely what I would consider clean or organized. Most of the time it looks like a bomb just went off, or a tornado (known as my toddler) has just blown through. I can usually tidy up enough to work on something and ignore the rest. Because, really, when my sewing time is measured in naptime, the last thing I want to do is spend it cleaning.

Example A: Terrifying mess of a studio

Example A: Terrifying mess of a studio

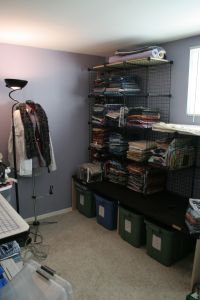
But, the chaos in my studio finally expanded to the point where something had to be done. I store most of my fabric in big plastic tubs, and most of the quilt fabric in modular wire shelves against one wall. However, lots of little projects and digging around for specific pieces of fabric had left things piling up all over the place, including stacked on top of the already stacked tubs. Needless to say, it was a pain to get anything out of the tubs, particularly the one on the bottom.

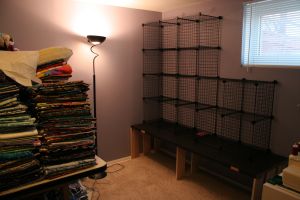
Better...

Better…

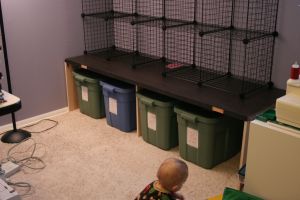
Conveniently, I had an old door sitting around from a closet we removed a couple of years ago. The door was a little narrower than standard, and having seen a post a few years ago about turning a hollow-core door into a desk, I thought I’d hang onto it just in case. At some point, the idea of making a shelf out of the door popped to mind. Something high enough that I could fit some of the fabric tubs underneath it (making them more accessible), and put my wire shelving on top of the shelf (thus making better use of the vertical space). My wonderful husband cut some pieces of scrap wood for the legs and helped me assemble the shelf.

Wuhoo! Tub storage!

Wuhoo! Tub storage!

The shelf is pretty quick-and-dirty compared to the desk that inspired it, but I’m okay with that. Really, I plan to bury the shelf in so much fabric it will barely even be visible. The unstained bits on the edge of the door are where the hinges used to be. And yes, that pink area towards the back of the shelf is Hello Kitty duct tape. Did I mention this was a quick project? Anyway, I didn’t want any creepy-crawlys building webs in the hole where the doorknob used to be. With my studio being in a basement I get plenty of spiders already, no need to provide them another place to live.

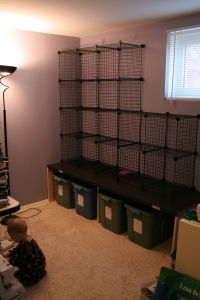
Ready for fabric!

Ready for fabric!

I can’t believe what a difference it makes just re-arranging the space with the added shelf. It feels so much better working in here now. And I was able to add a couple of additional cubes to the wire shelving, which meant I could store more of my fabric in sight instead of in a tub. As an added bonus, going through most of my fabric has inspired me to sew more of it up! I pulled out a small pile of “sew up soon” fabrics and left them on my ironing board. I’ve already worked through most of the pile (although some pieces have been cut up, but not sewn up yet).

Filling up quickly...

Filling up quickly…

I should note, piling up fabric and patterns on my ironing board or cutting table is pretty much my version of a sewing plan. For anyone else who is as bad as I am about planning what to sew, might I suggest this excellent post? The first bit is pretty darn funny, and offers a good reason for a little planning. Now that I’ve got a better handle on my ridiculous fabric stash, I just might try a little better planning to sew through some of it. Once I get through the pile of fabric on my ironing board that is.

Quick Baby Quilt

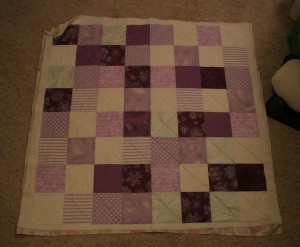
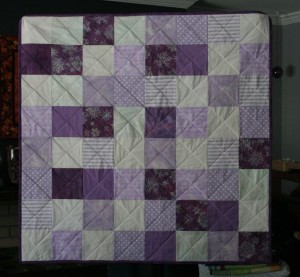
I had plans to make a baby quilt for some friends who were expecting their second daughter mid-February. As it turns out, she arrived a few weeks early (healthy and happy thankfully). Since I hadn’t actually started the quilt yet, I needed to get busy! They told me the colors for her nursery are purples and whites, both of which I have a decent amount of in my quilt stash. I made a quilt for their first daughter in purples and green, and since I had some of the fabric leftover I used some of that purple in this quilt.

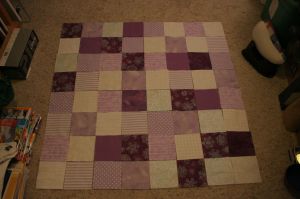
I cut 5.5″ blocks from all the fabrics I gathered up and decided I’d figure out the pattern based on how many blocks I had of each color. I knew I had an 8 by 8 grid to work with, since I wanted the finished quilt to be about 40″ square (no borders). After piling up all my cut blocks I discovered I really didn’t have enough of any of the colors to do any kind of pattern I could think of. My husband suggested I just do a random layout. Even though I’m not generally a fan of just laying blocks out randomly, it worked out nicely in this case. Good thing too, since it was really my only option for using the fabric I had on hand.

IMG_3385

Randomly laid out blocks

Apologies for the lousy photos. The light in my studio at night is sufficient for sewing, but not really for taking photographs.

The whole thing went together really quickly. I had the blocks laid out on the floor, in the random arrangement I settled on the night before, and I just picked up a row of blocks at a time and started sewing. I think I managed to piece the whole thing during one of my son’s naps and quilt it later that evening.

IMG_3398

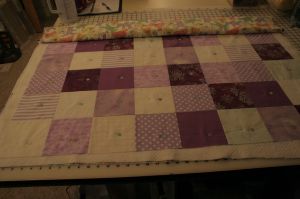
Pinned and ready to quilt!

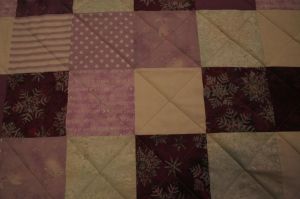
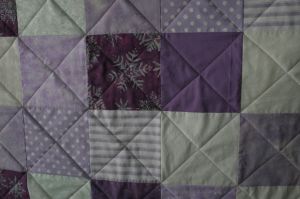
The backing is a single piece of a cute bear print (also from the stash). That’s one of the nice things about baby quilts – usually they’re small enough that the backing doesn’t have to be pieced. I machine quilted the whole thing with a basic cross-hatch design. It’s what I use for most of the baby quilts I make. I love that it’s easy, looks good, and can be done as continuous line quilting (less thread trimming for me!).

IMG_3401

Cross-hatch quilting

After quilting it, I serged around the edges before binding. It’s a trick I learned from a long-arm quilter a while ago. Serging the edges just helps hold everything in place and makes it easier to bind the quilt.

Quilted, but not serged yet

Quilted, but not serged yet

The binding strips were cut 2.5″ wide and folded in half before attaching. I’ve always bound my quilts this way, since I figure the two layers of binding will wear better than just one.

And then it was done. Finished in record time. Now we just need to deliver it…

All done!

All done!

Here are some finished shots taken in daylight. The colors show much better with decent lighting!

Up close...

Up close…

Bears on the back

Bears on the back

On to the next project…

Just in time for…next year

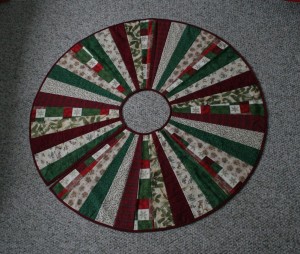
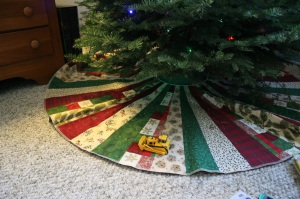
As I mentioned in my last post, I finally got around to making a Christmas tree skirt. Technically it wasn’t finished in time for Christmas, but close enough to actually use.

Missing the binding

No binding yet…

After we finally took the tree down, I actually finished the skirt, so now it’s packed up and ready to use next year. All I had left to do was add the binding, so it was an easy finish. I won’t say “quick” since binding a full circle is somewhat time consuming, but it was easy.

IMG_3391

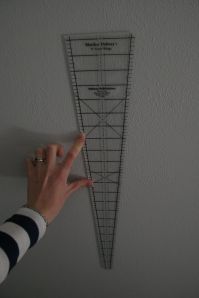
Now let me back up a little bit to the construction of the tree skirt. I originally thought I’d have to re-remember geometry to figure out the pattern pieces. Lucky for me, someone already designed a specialty ruler for that. I borrowed this ruler from my Mom (she has all the fun sewing tools), and used it to cut all the wedges.

IMG_3368

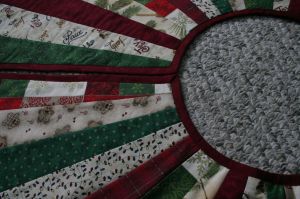
It’s a 9 degree wedge that works out to about a 50 inch circle with forty wedges. The ruler leaves a 6 inch (I think) circle opening in the center, with the idea that for a regular quilt you put a small circular block right there. I actually enlarged the center circle a little bit to be more like 10 inches (I didn’t actually measure) so there would be plenty of room for the tree stand.

IMG_3393

Also, I left an opening between two of the wedges so I could put it around the tree stand after the tree was in place. Because what are the odds that I would remember to put it over the stand before adding the tree if I didn’t leave an opening.

IMG_3397

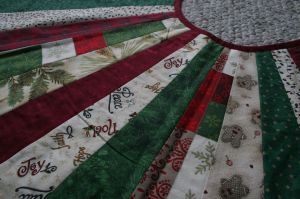
I wanted the tree skirt to have a scrappy look, so I raided my collection of Christmas quilt fabric for a bunch of different prints I liked together. There are forty wedges in the circle, and I found nine different pieces of fabric I like, so the four quadrants of the circle are the same. One print is used twice per quadrant. I like the scrappy look, but couldn’t bring myself to do the order randomly, so the order of the prints is the same in each repeat.

IMG_3394

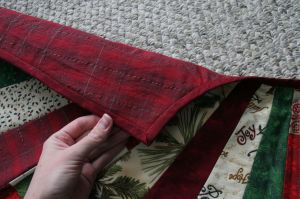
The back is a solid piece of a pretty red plaid with just a bit of sparkle. It’s the only piece I had enough of for the backing, which was the main factor in using it.

Overall, I’m pretty delighted with how the whole thing came out. It feels great to have finally made something that’s been on my to-do list for so long. And that I was able to make the entire thing out of stash fabric! Done and done!